Embed in Mobile (iOS)
For iOS Only
This guide is designed for the iOS operating system.
To embed within an Android app, please use the Android version of this guide located at the folllowing link: Embed in Mobile (Android).
Using the Trip Element in a Mobile Application (iOS)
To load the Trip Element within a mobile application, we recommend using the WKWebView object Class for iOS.
Step 1: Set up the Source HTML file
First, you can create a standard HTML file that loads the Trip Element just like any other webpage. Here, you can define your elementConfig and pre-configure the element with the desired properties.
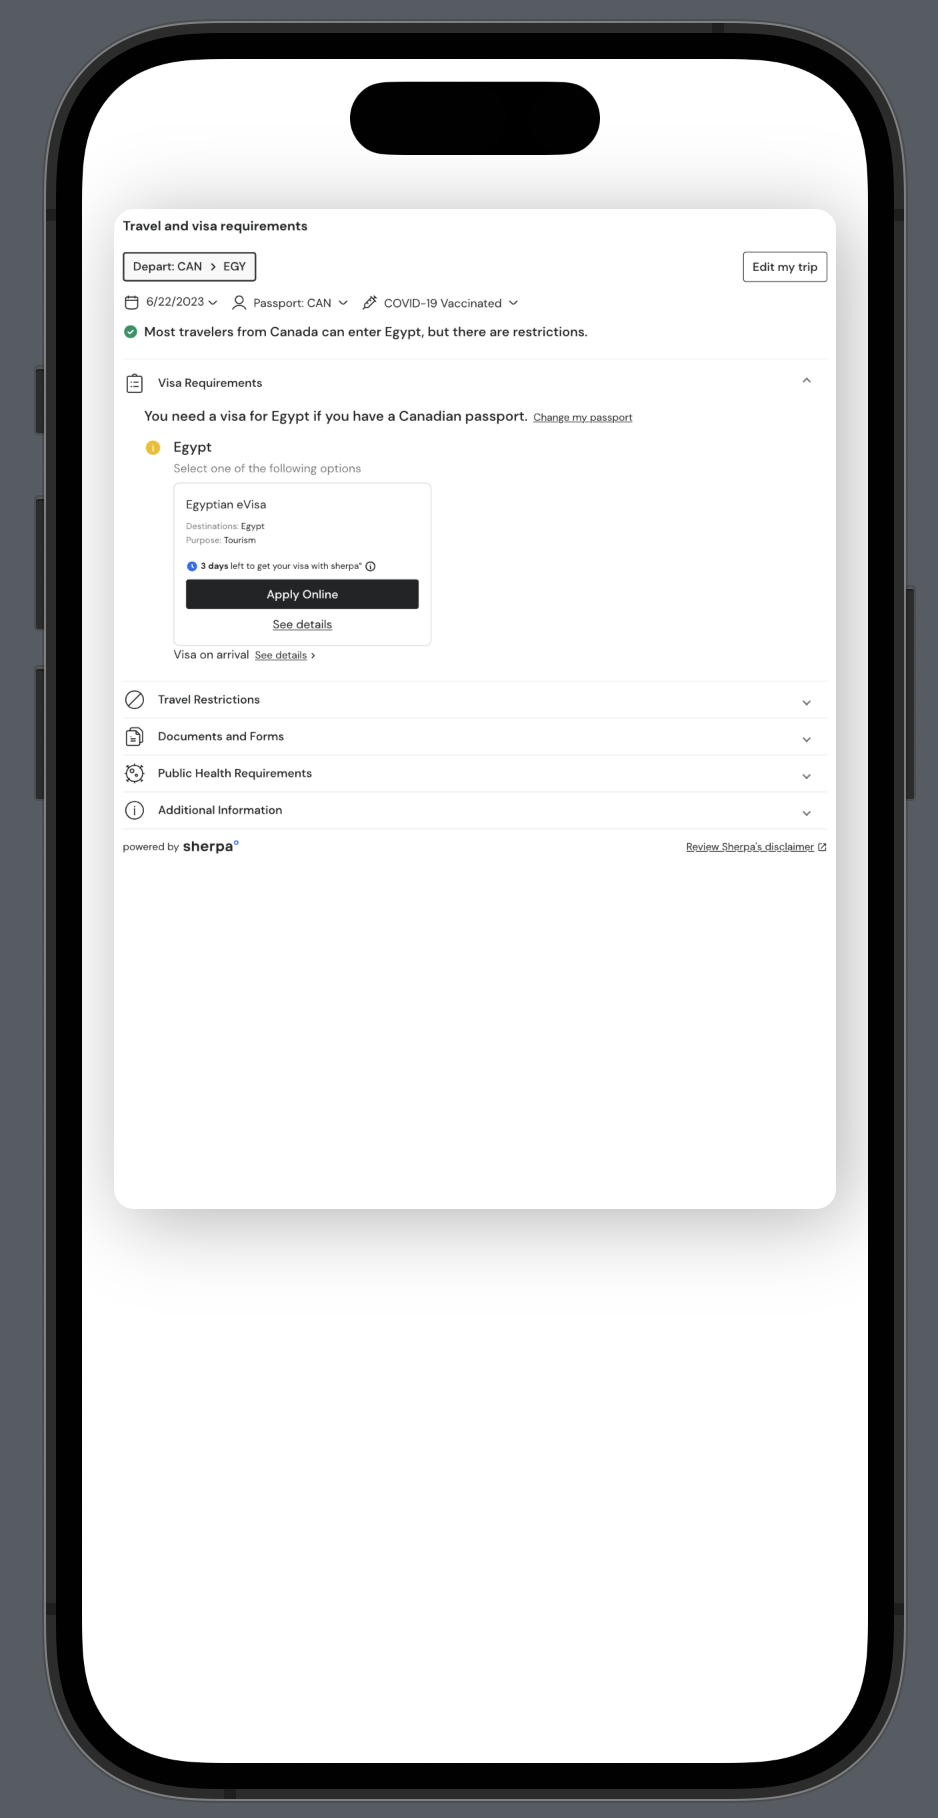
In this example, we have pre-configured a trip for a CAN passport holder traveling from CAN to EGY
<html>
  <head>
    <!--
    Include the sherpa° SDK by adding the script tag to the head of your HTML file and include your personalized APP_ID.
    Note: You will receive a unique APP_ID during onboarding.
    -->
    <script src="https://sdk-sandbox.joinsherpa.io/widget.js?appId=<<your_appID>>" defer></script>
  </head>
  <body>
    <!-- Place an empty <div> element on your site to act as the mount point. -->
    <div id='sherpa-trip-element'></div>
    <script type='text/javascript'>
      // Set up the element configuration
      const elementConfig = {
        // 1. Element Placement: Where the Element is being placed on your site e.g. mmb, discovery
        placement: "discovery",
        travellers: [{
          nationality: 'CAN', //traveller's passport
          vaccinations: [{
            type: 'COVID_19',
            status: 'FULLY_VACCINATED',
          }, ],
        }, ],
        segments: [{
          segmentType: 'OUTBOUND',
          origin: {
            countryCode: 'CAN',
          },
          destination: {
            countryCode: 'EGY',
          },
          travelMode: 'AIR',
          departureDate: '2023-06-22',
          departureTime: '12:59:00',
          arrivalDate: '2023-06-22',
          arrivalTime: '12:59:00',
        }, ],
      };
      // Filter for skdLoaded event then call element
      function onSherpaEvent(event) {
        if (event.type === 'sdkLoaded') {
          // Sherpa SDK is ready, create and mount new element
          $sherpa.V2.createElement('trip', elementConfig).mount('#sherpa-trip-element');
        }
      }
    </script>
  </body>
</html>
Step 2: Setup WebView and Call the HTML file
Next, set up WebView in your development environment. Here, you will call the HTML file that you created in Step 1 in order to display the Trip Element within your mobile app (Line 8). The following code sample is written in Swift.
import SwiftUI
import WebKit

struct ContentView: View {
    @State private var showWebView = false

    // Set HTML file as string
    private let urlString: String = "<<html_filname.html>>"

    var body: some View {
        VStack(spacing: 40) {
            // Normal WebView
            WebView(url: URL(string: urlString)!).frame(height: 500.0)
                .cornerRadius(10)
                .shadow(color: .black.opacity(0.3), radius: 20.0, x: 5, y: 5)
            Spacer()

        }.padding()
    }
}

// WebView Struct
struct WebView: UIViewRepresentable {

    var url: URL

    func makeUIView(context: Context) -> WKWebView {
        return WKWebView()
    }

    func updateUIView(_ webView: WKWebView, context: Context) {
        let request = URLRequest(url: url)
        webView.load(request)
    }
}


struct ContentView_Previews: PreviewProvider {
    static var previews: some View {
        ContentView()
    }
}
Step 3: Sample Output
You should now have the Trip Element loaded within your mobile app. Sample output is provided below.
Updated about 2 years ago