Trip Element quick start
Get up and running in 5 minutes
Get started
Implementing the eVisa Trip Element with the SDK is quick and simple.
In the following guide, we will show you how to embed the Trip Element on a page in 3 simple steps.
We will also show you some additional customization options for more advanced users.
Video Element
You can find a video
walkthrough of
this Quick Start.
Step 1: Setup sherpa° SDK
You need to include the sherpa° SDK by adding the script tag to the head of your HTML file and include your unique APP_ID provided by sherpaº.
You will need to select the appropriate URL and APP_ID depending on whether you are using our Testing or Production environment:
Step 2: Place Tag
Place an empty div tag on your page where you want the Trip Element to appear.
Step 3: Create Element
Use the sherpaº SDK to create an instance of the Trip Element and mount it to the div tag you created in step 2.
You should see the Trip Element appear on your page.

Personalization
To provide the best user experience, you can pre-fill the Trip Element with a traveller's details.
In the example below, we will pre-configure the following parameters for an eVisa & Travel Requirements Trip Element:
- Element placement
- Traveller's nationality
- Origin
- Destination
- Departure and arrival date
- Flight number
In the example below we are pre-configuring the above properties that are common in a Manage My Booking (MMB) page. These were chosen for demonstration purposes only. For your use case, you can choose to pre-configure all, some, or none of these properties.
The data passed as a part of configuration will also be used to pre-fill the application of the traveller. This will reduce the probability of mistakes and the application time, and ultimately lead to a better user experience.
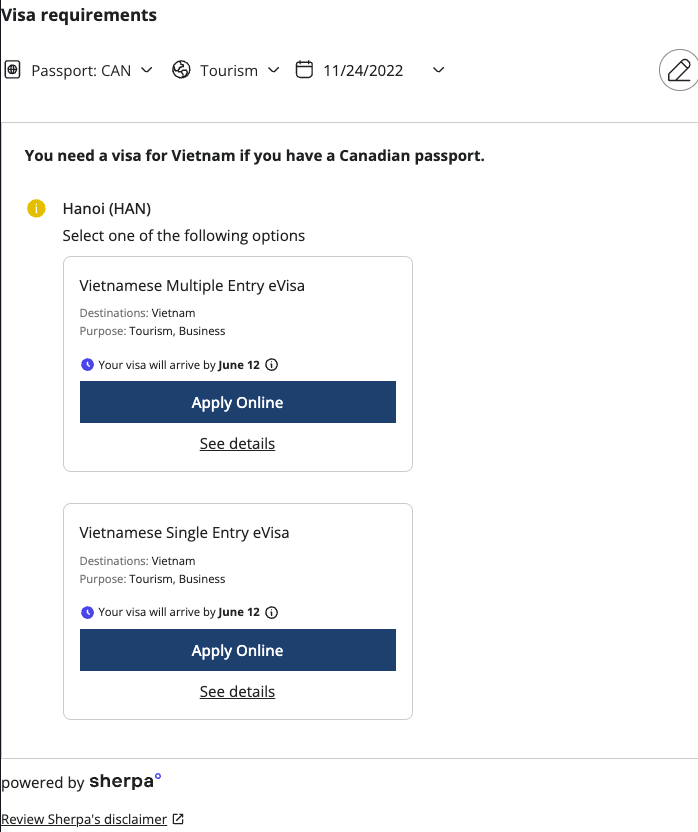
The output of the above example is shown below: